

Hi, are you interested in making an iOS app without a storyboard using Objective-C?
Though Objective-C language is quite old, companies and individuals still use it, like me and my previous company. Back in the day, I even had a hard time finding a guide on how to make without a storyboard. If not for my friend, Teteng, I would have been searching for a week!
Configuring the project to not use a storyboard, is quite simple, we usually call this here programmatic iOS app development.
Step 1 — Create a new iOS project that uses a storyboard
We will first create a storyboard project as a base since Xcode does not support directly creating non-storyboard projects.
On your Xcode app, click the File > New > Project. Or simply press ⌘+⇧+N.
- Then under iOS, choose App.
- Name the project. You can use “NoStoryboardDemo”, but it’s up to you.
- Clear the check marks for core data and include tests, since we don’t need them for this demo.
- Click Next. And finally, click Create on the next screen.
Once your project is created, you should be able to see something like this:

Newly created storyboard project that will serve as a base for our non-storyboard project
Step 2 — Configure the instance implementation method of scene:willConnectToSession:options:
The scene:willConnectToSession:options: is a delegate method inside the SceneDelegate.m. You need to put some necessary implementation code here so that your project will not use the Main.storyboard file.
- Inside the create an instance of UIWindow using the UIScene came from the delegate method
self.window = [[UIWindow alloc] initWithWindowScene:(UIWindowScene *)scene];
Note
This line of code creates an instance of UIWindow using the UIScene that came from the delegate method.
The UIWindow object represents the app’s window on the screen and is responsible for managing the app’s user interface.
- Set the root view controller of the window’s instance. Do not forget to import the ViewController class.
[self.window setRootViewController:[[ViewController alloc] init]];
Note
This line of code sets the root view controller of the window’s instance.
The root view controller is responsible for managing the app’s main view and its content.
In this case, we are setting the root view controller to an instance of the ViewController class.
- Show the current window and position it in front of all other windows at the same level or lower.
[self.window makeKeyAndVisible];
Note
This line of code shows the current window and positions it in front of all other windows at the same level or lower.
This makes the window visible on the screen and ready to receive user interactions.
After these, you should have the following code inside the SceneDelegate.m:
#import "SceneDelegate.h"
#import "ViewController.h"

@interface SceneDelegate ()

@end

@implementation SceneDelegate

- (void)scene:(UIScene *)scene willConnectToSession:(UISceneSession *)session options:(UISceneConnectionOptions *)connectionOptions {
    self.window = [[UIWindow alloc] initWithWindowScene:(UIWindowScene *)scene];
    [self.window setRootViewController:[[ViewController alloc] init]];
    [self.window makeKeyAndVisible];
}

...
Step 3 — Configure the ViewController class
Once the root view controller is set to ViewController class, we can now make some UI modifications to see if we really made it a non-storyboard project.
- On ViewController.m, change the background color of the view to blue.
#import "ViewController.h"

@interface ViewController ()
@end

@implementation ViewController

- (void)viewDidLoad {
    [super viewDidLoad];
    self.view.backgroundColor = UIColor.blueColor;
}
@end
- Run the project (⌘+R). You will notice that the background has been changed to blue.
Step 4 — Clean up
Now that we made successfully run the non-storyboard project, we can now remove the unnecessary files and entries from Info.plist.
- Delete the Main.storyboard file
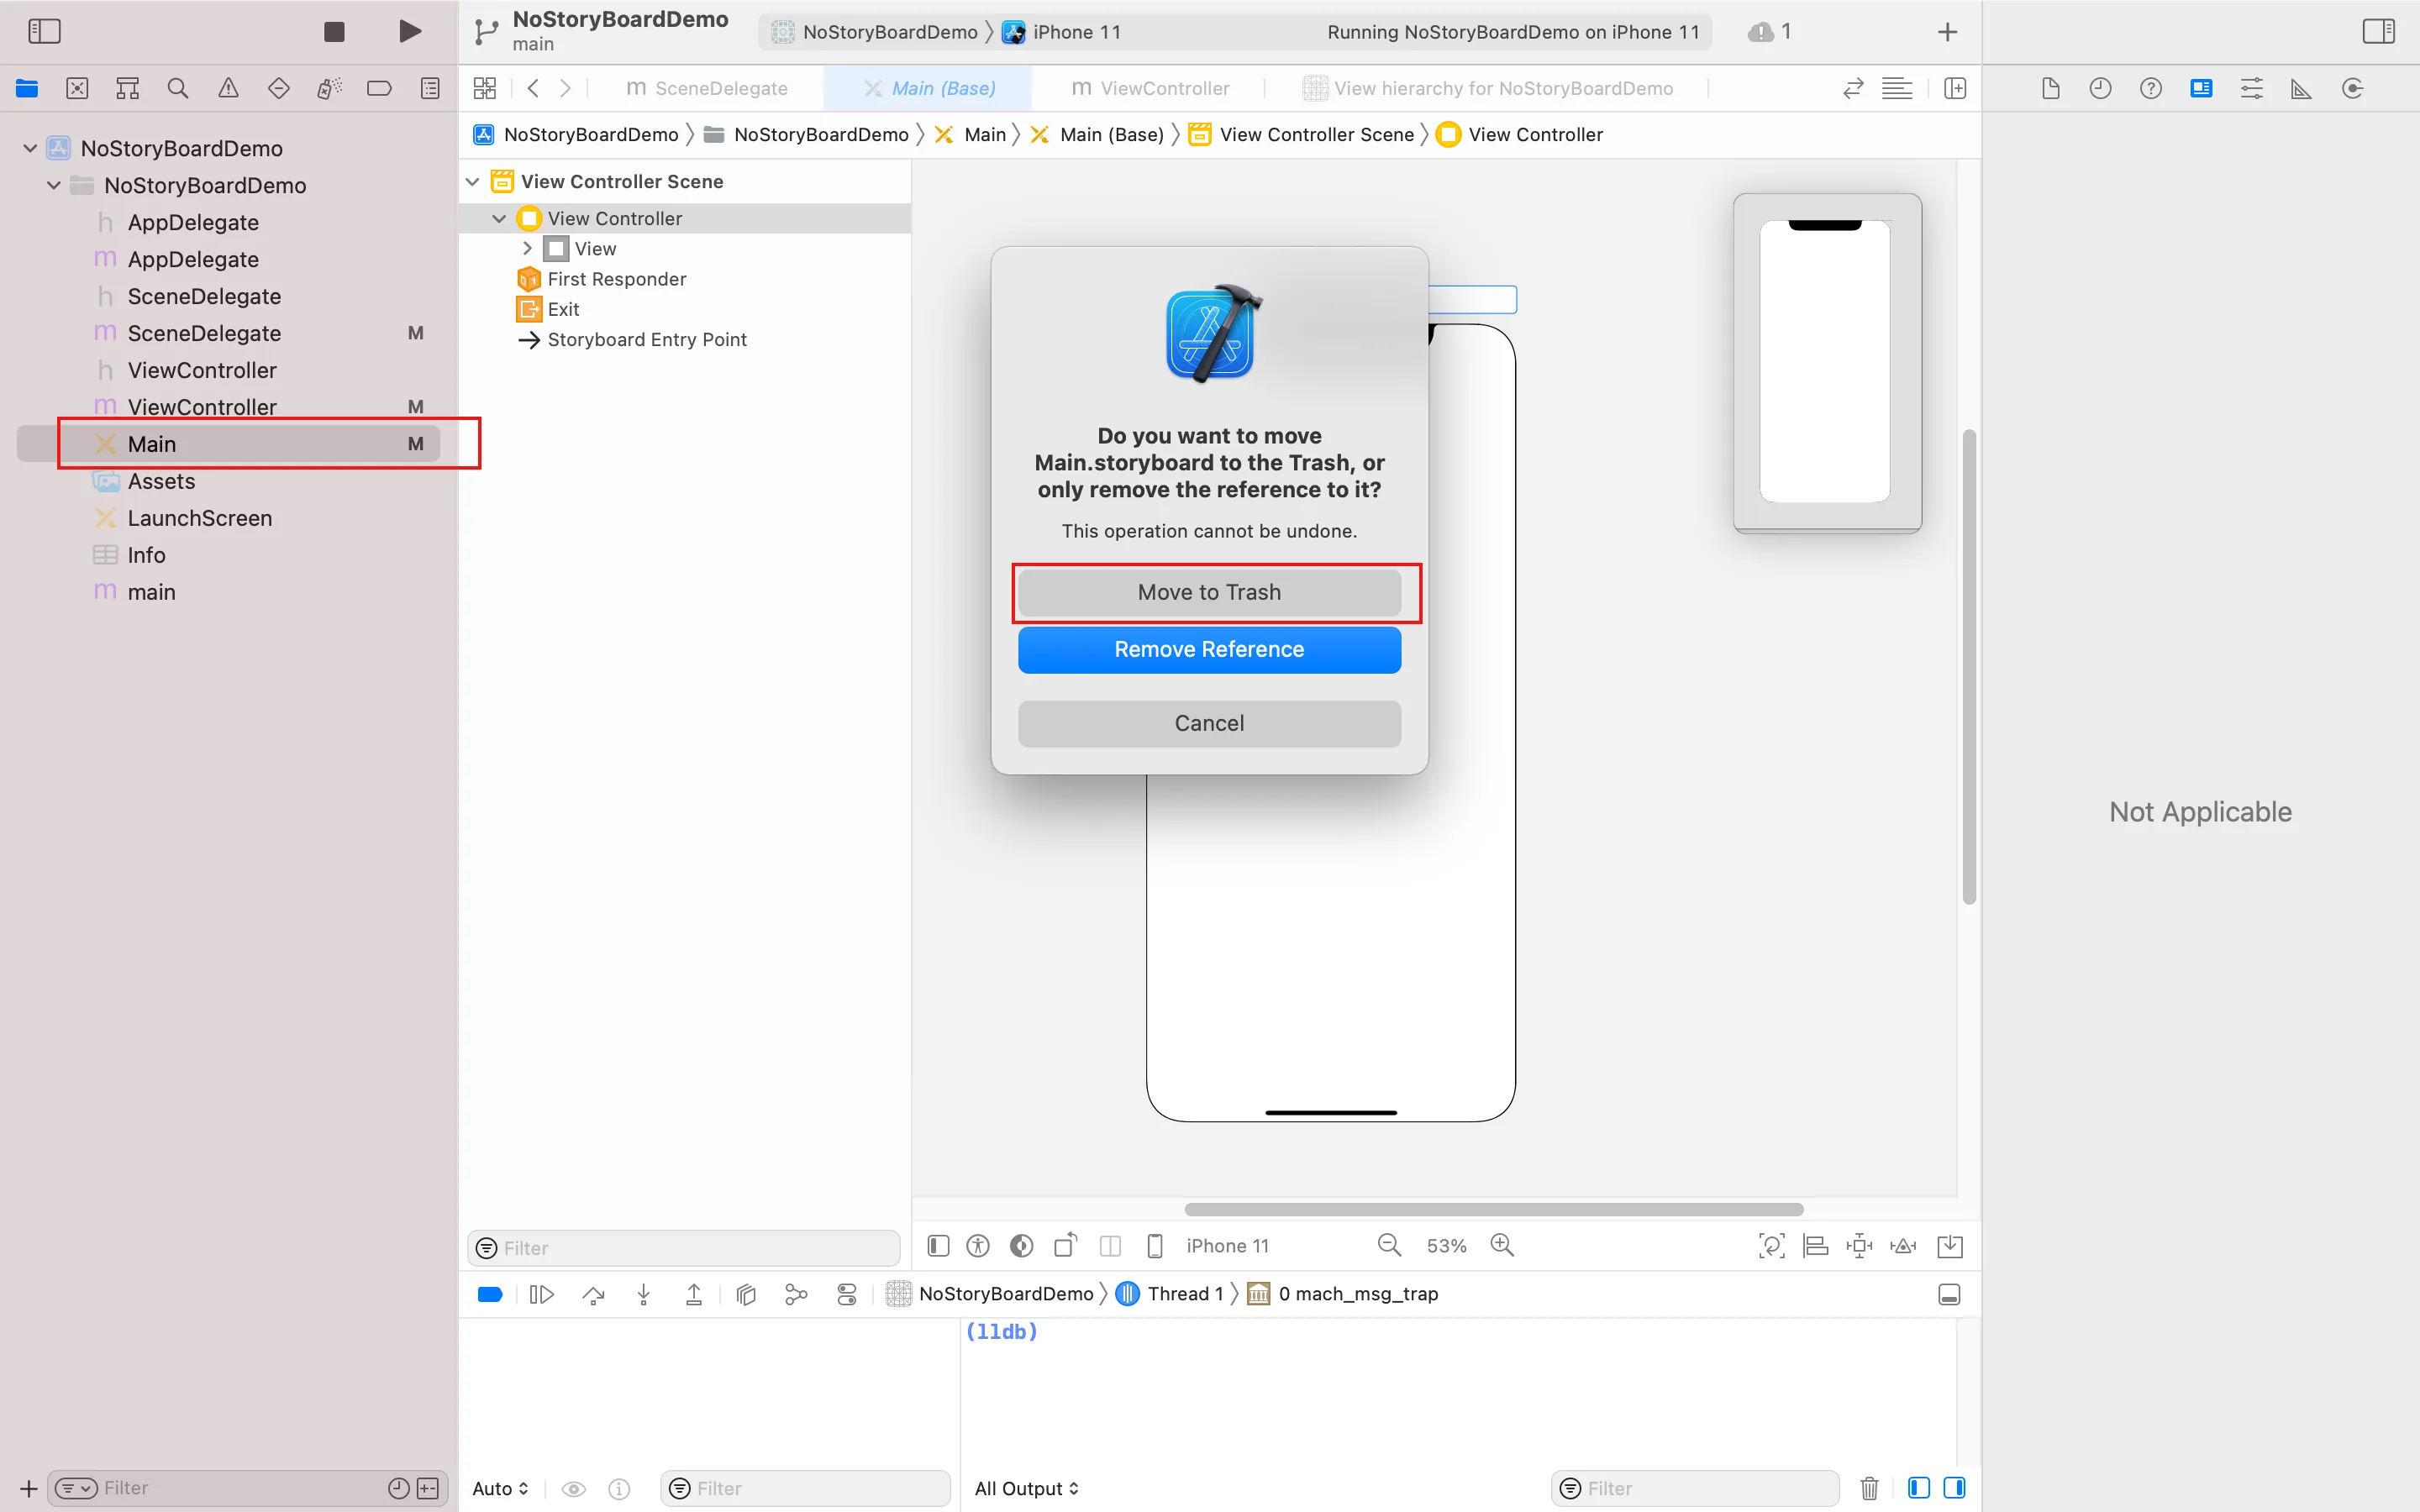
Deleting Main.storyboard file
- On the Info.plist file, delete the “Storyboard Name” field
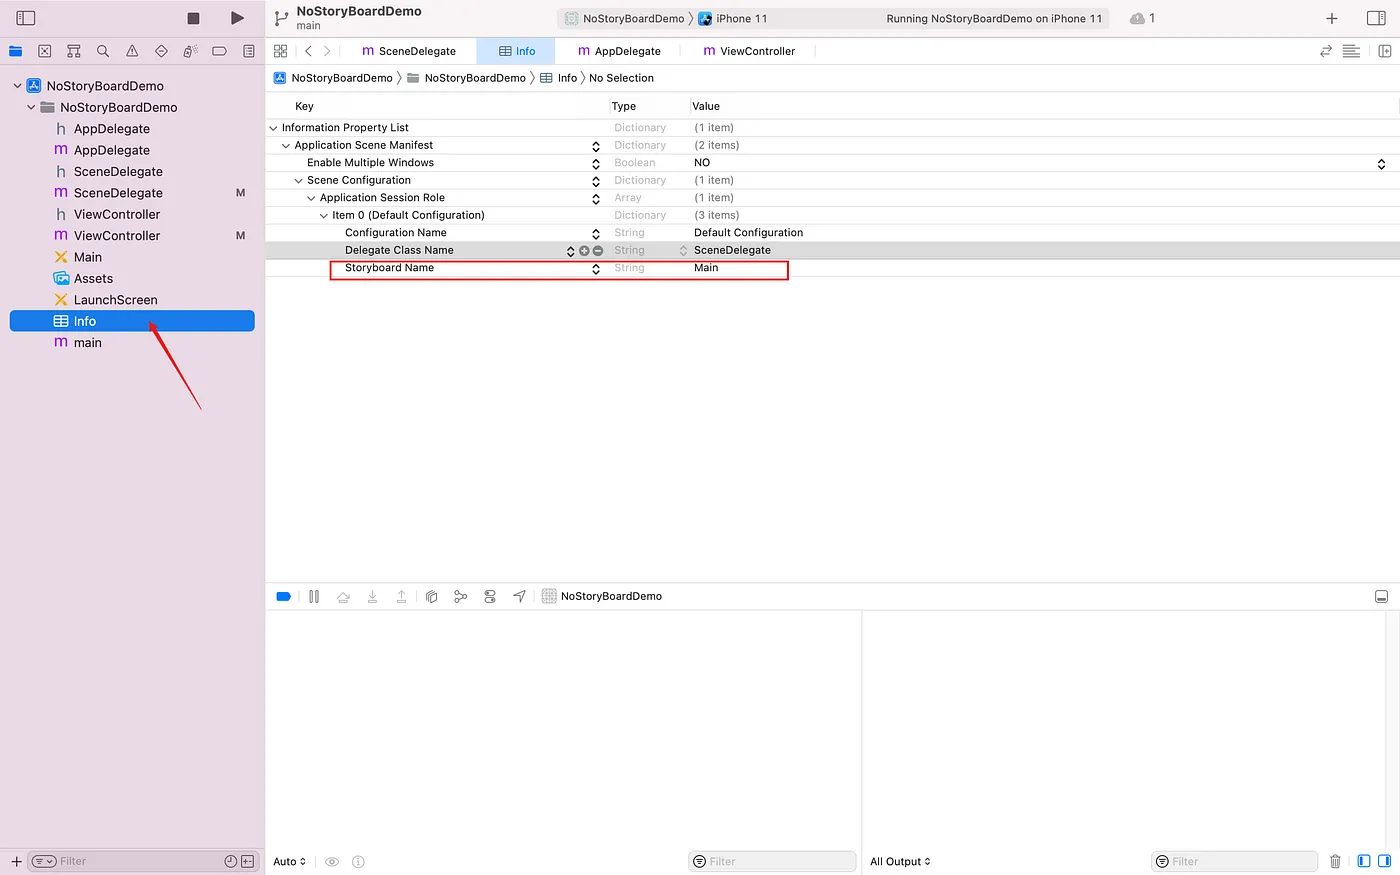
Deleting storyboard name field
- On the Targets, select the “NoStoryBoardDemo”. Select the Info tab, and delete the “Main storyboard file base name” field

Deleting Main storyboard file base name
- Run the project again, and it should run without problems.
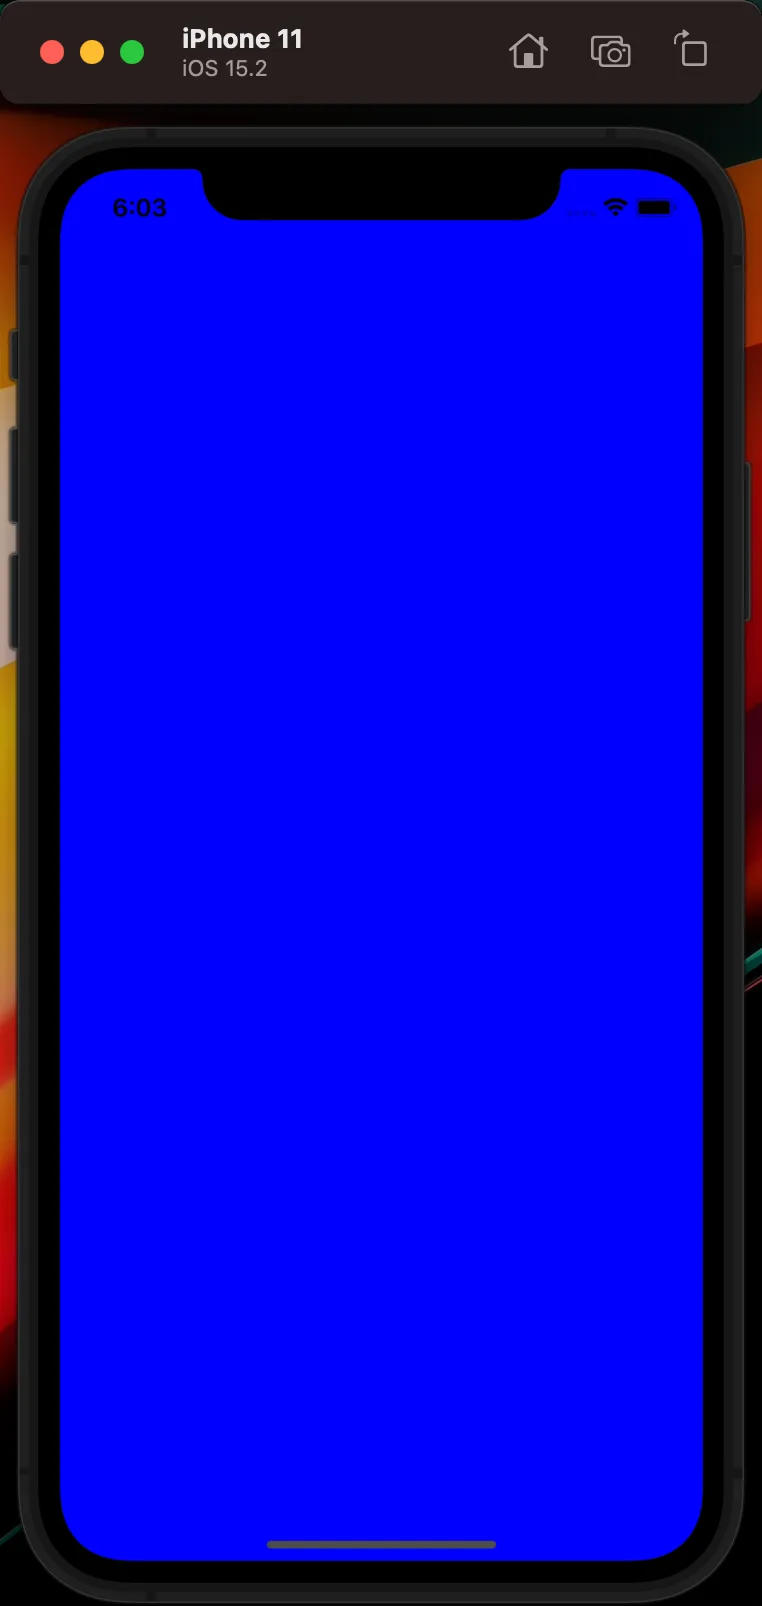
iPhone 11 simulator after cleaning up the unnecessary files and properties
Conclusion
In conclusion, this tutorial has shown you how to create an iOS app without using a storyboard in Objective-C. By following the steps outlined in this tutorial, you can configure your project to not use a storyboard and instead create your app’s user interface programmatically. This approach gives you more control over the layout and behavior of your app’s user interface and can be a useful skill for iOS developers.
I hope that this tutorial has been helpful and that you now feel confident in creating iOS apps without using a storyboard. Happy coding! 😊
Now that you know how to make an iOS project that does not use storyboard, the next step is to learn how to add your own custom UIViews! Take a breather first, then proceed with the next article linked below:


